Whiteboards can be messy and hard to manage for remote teams. Qlerify provides a dedicated online Event Storming tool that enhances collaboration, provides structure, and uses AI to accelerate your design process from start to finish.
To get started, log in to Qlerify or sign up for free, create a new project, and follow this step-by-step guide. We will walk you through the detailed steps of conducting a Software Design-level Event Storming session in Qlerify.
For a deeper dive into the method, you can also read our complete article on the topic: Event Storming - The Complete Guide.
Create a new, empty Workflow and open it. You should see a view similar to the image below. This is your blank workspace, where you can Add a starting point, Generate a workflow with AI, or review and update Settings. You can also invite team members to collaborate on the project.
For more details about this view, click the question mark icon.

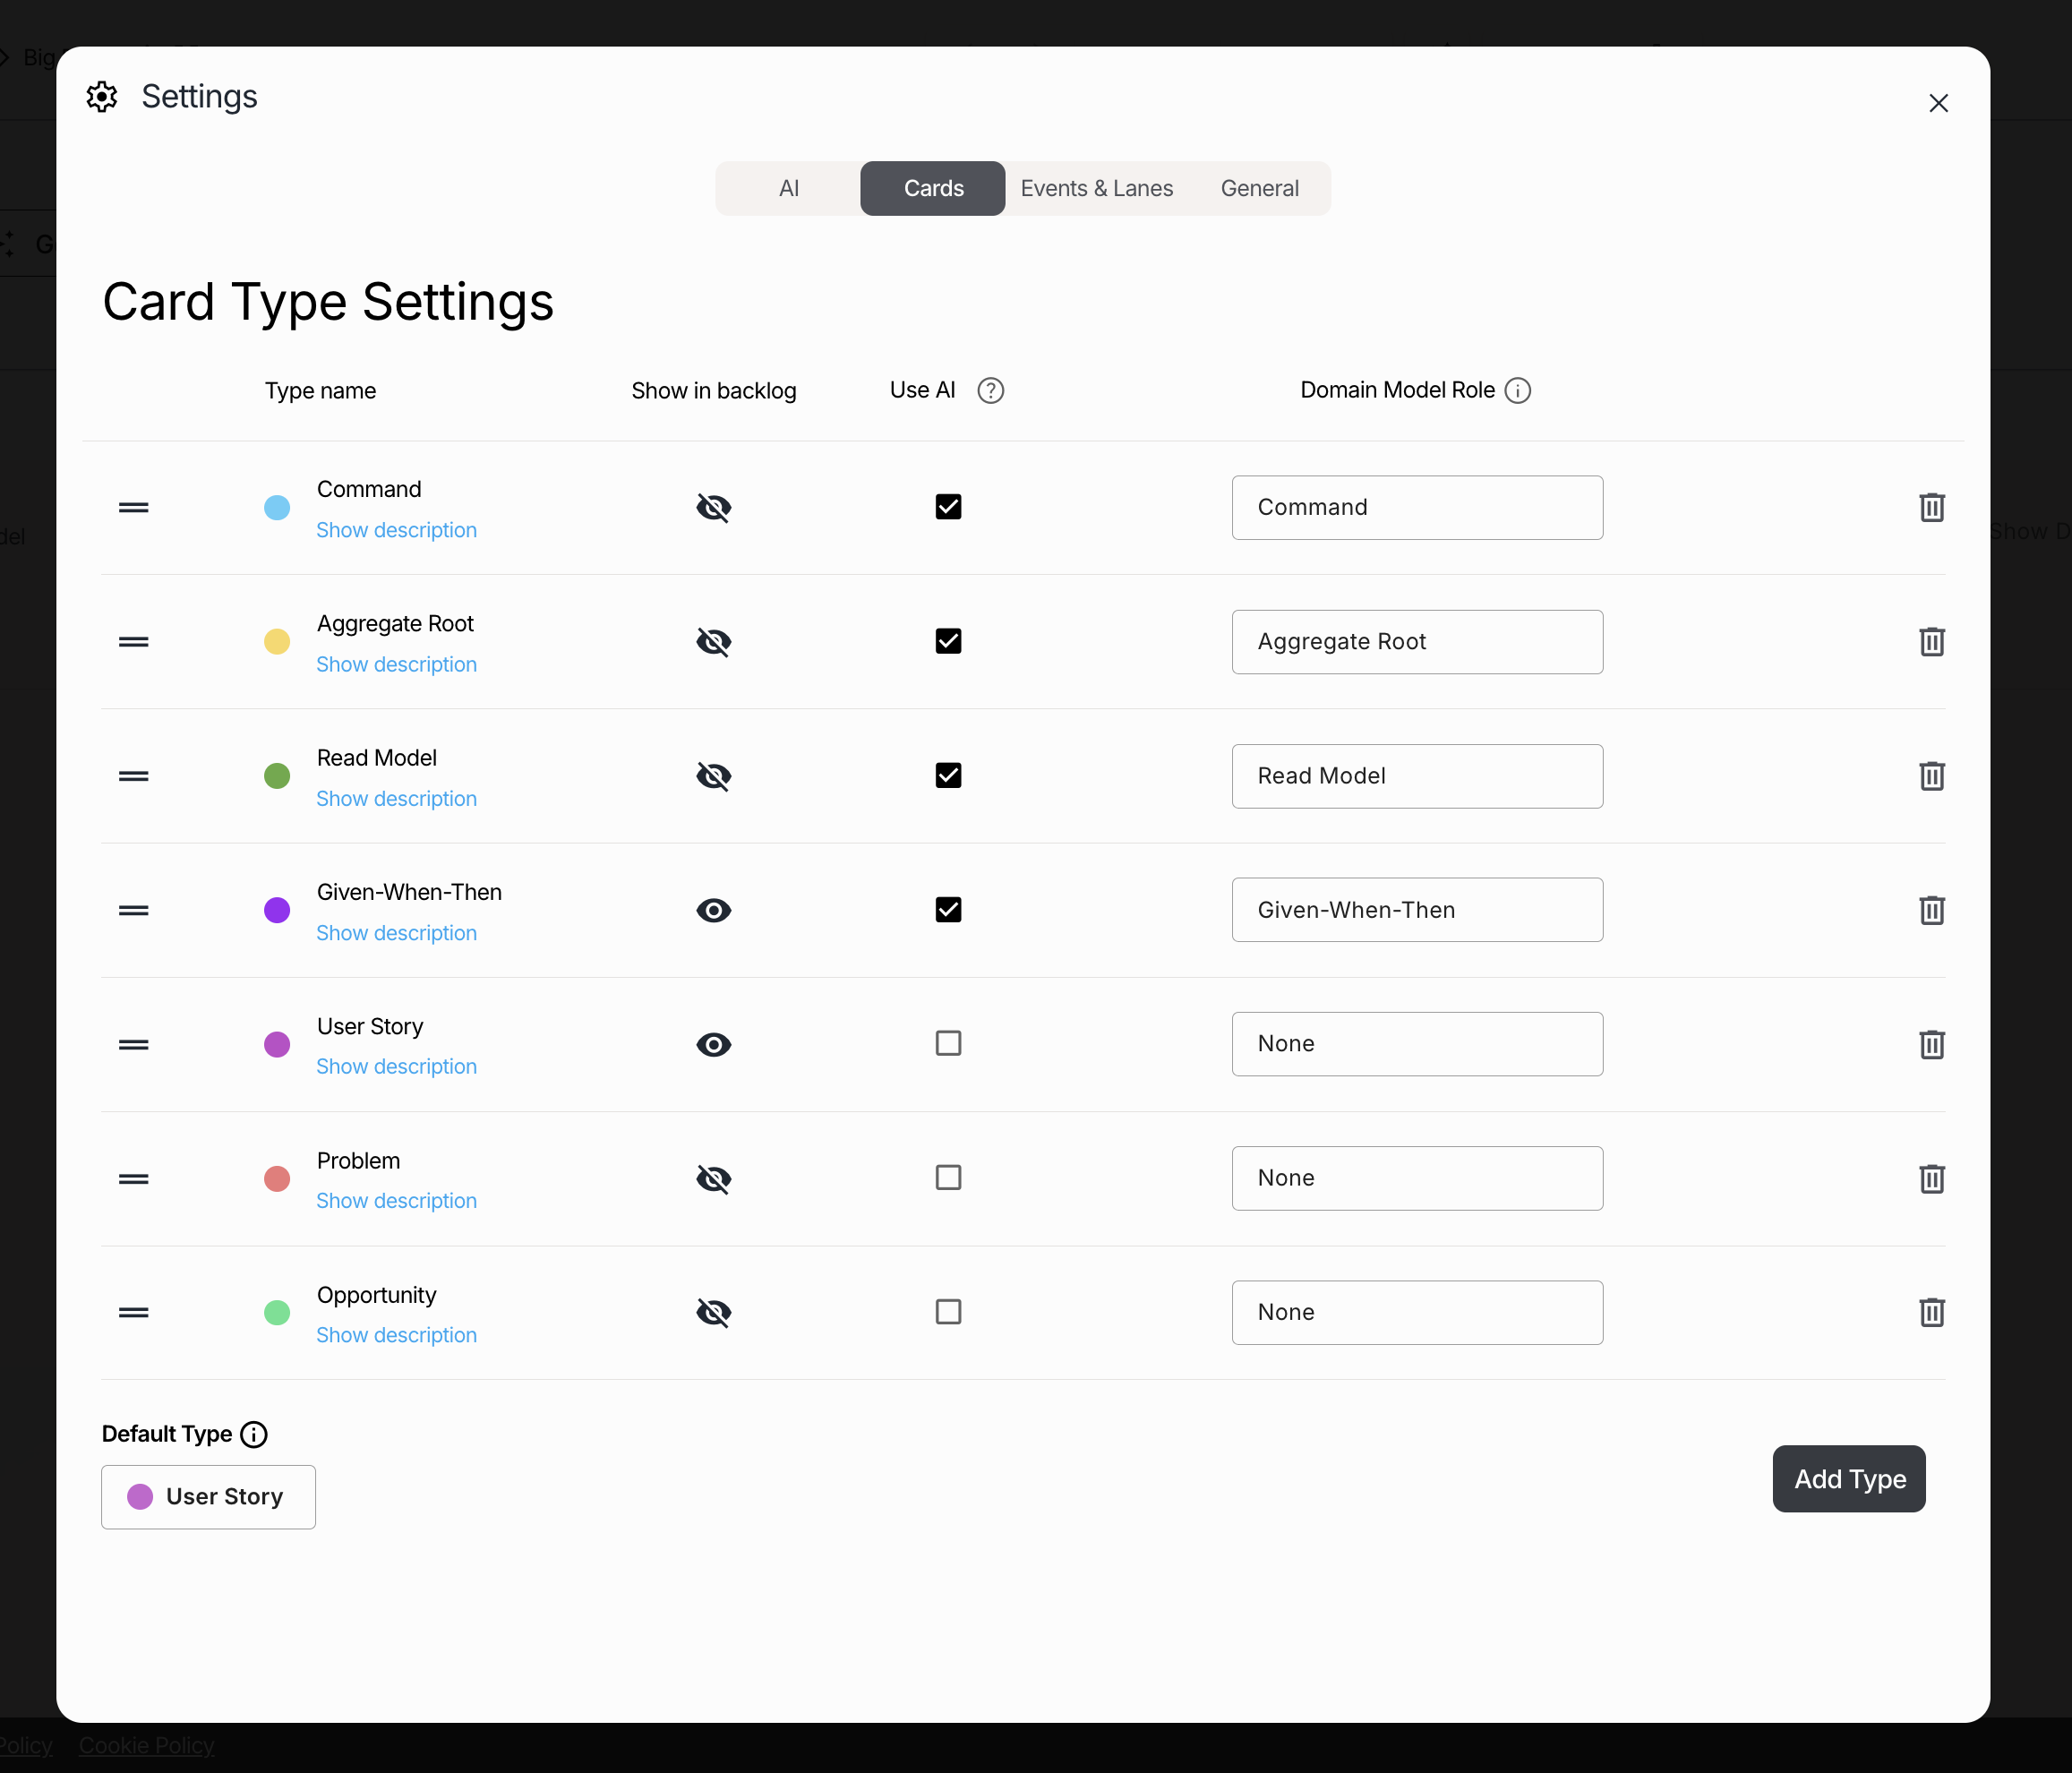
Open the Settings by clicking the cogwheel above the Workflow diagram, then select the Cards tab.
When you create a new Workflow in Qlerify, a default set of card types is provided. These can be used for Big Picture, Process Modeling, and Software Design-level Event Storming. You can add, update, and remove card types based on your needs. The default setup includes the following card types:

The card types Given-When-Then and User Story are not typically part of standard Event Storming. However, if you want to enhance your Software Design session, feel free to include Given-When-Then (GWT). In this example, though, we will leave them out.
Go ahead and update the Card Type Settings:

Note: There are three special card types (Command, Read Model and Aggregate Root) that we use to be able to group Commands and Events around Aggregates at the end of our Software Design session.
Note: If you think Aggregate is a confusing term, feel free to change it to something like "Entity" or "Information Object".
Finally, you can review—and update if needed—the descriptions of each card type by clicking Show description. These descriptions are used for AI prompting.
You can generate full workflows with AI whenever you start with a blank canvas by clicking "Generate Workflow with AI". Once you started adding events to a workflow, this button will no longer be visible.
There are several LLMs (Large Language Models) available for you to use. In this example, we used ChatGPT-4o. You can select your preferred LLM from several options in the workflow Settings (under the AI tab).
Click on "Generate Workflow with AI", then click in the text area at the top of the dialog. Now select "A CRM process used by Salesforce." from the list displayed. Feel free to modify it to make it more detailed if you want:
Next, deselect all three checkboxes "Generate Command..", "Generate Entities.." and "Generate Read Model..". These are used for Event Modeling and Domain-Driven Design. Now click "Generate Workflow."

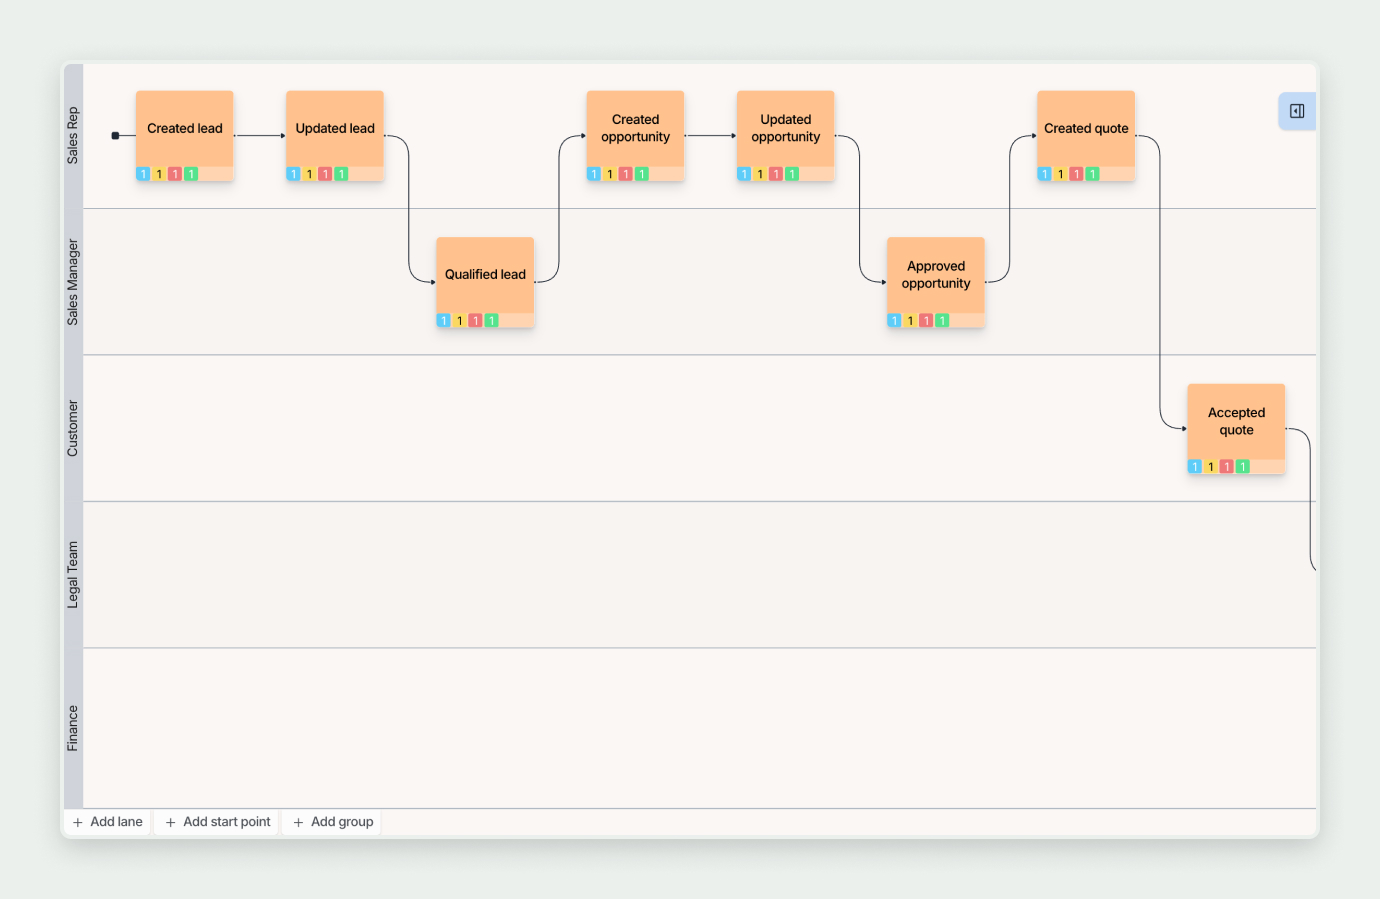
Once the AI generation is complete, you may end up with a result similar to the example below, though the variation can be significant.

Now, collaborate with your team by going through the workflow step by step to ensure each step is correct. You can invite all your team members to Qlerify for real-time co-editing. Sometimes, it’s best if one person navigates the tool while others contribute verbally. This depends on the situation and your facilitation style.
Start with the first event, "Created Lead," and follow these steps:


Note: In Software Design Event Storming, each event should correspond to one state-changing command that operates on a single aggregate. If an event is not state-changing, consider leaving it out. If one event corresponds to multiple commands, split it into multiple events.
Note: When updating the Aggregate, a combo box will appear, allowing you to generate entities. At this stage, we will not generate entities but instead use a free text label for the Aggregate name. For more details on using Entities, see our articles on Domain-Driven Design and Event Modeling.


Now, repeat Step 4 for each event, refining your workflow iteratively. You don’t need to complete everything in a single session—you can revisit your workflow and refine it in separate sessions with different groups of people.
Things to Keep in Mind:


Qlerify offers powerful support for defining Entities, Read Model Attributes, and Command Attributes. For more information on these features, see our articles on Event Modeling and Domain-Driven Design (links in the footer).
Qlerify provides an instant view of Commands and Events grouped around Aggregates. This view is located under the workflow diagram in the Domain Model tab.
The view might look similar to the image below. Each command (the blue boxes) has its corresponding event on the right side, aligned at the same height. Here, you can see a summary of your aggregates and the commands available on each aggregate.

The next step is to assign a bounded context to each aggregate. To do this, click "Select bounded context." After creating and selecting bounded contexts, for example Lead Management and CRM, the view may look something like this:

You have now captured the workflow and identified bounded contexts, aggregates, commands, actors, problems, and opportunities (and maybe even some GWTs). You have built the foundation of the domain model.
Now, you can further refine your model by specifying entities, read models, and write models in detail. For more information, see our articles on Event Modeling and Domain-Driven Design.
As a final step, review the identified problems, opportunities, and GWTs, and plan them into iterations.
You can use either the Backlog or the User Story Map view. In this example, we use the User Story Map, which is located in a tab under the Workflow.


At Qlerify, we have extensive experience with Event Storming and offer Qlerify, a unique cloud-based tool designed for this methodology. Sign up today!
We also provide open and custom courses on Event Storming, in partnership with NFI. More information about the course can be found here: Event Storming Course
Need help getting started? We facilitate on-site and remote Event Storming workshops.
Contact us via the form in the footer to explore how Event Storming can benefit your organization!